 By Owen Palmer
Updated November 2026
The acer pm1 series portable monitor is a lightweight, USB-C powered screen designed to add a second display to a laptop without a separate power brick. In this guide you will learn how to confirm your laptop supports it, connect it correctly, configure the display settings, and troubleshoot the most common problems. You will also get a checklist for judging whether this model fits your workflow.
What the Acer PM1 Series Is and Who It Suits
The PM1 series is part of Acer’s portable monitor lineup aimed at people who work away from a desk. Acer’s own product pages describe the line as a slim panel that runs off the host device, which means one cable can carry both video and power. That makes it useful for remote workers, students, and anyone who moves between a home office, a café, and a client site. Owners often describe it as most useful when paired with a 13- to 16-inch laptop that has limited screen real estate.
Shopping for one? See our guide: 5 Best Xbox Series S Portable Monitor Picks for Gaming on the Go.
Before buying or setting one up, confirm which variant you have. Acer has released several PM1-branded models with different panel sizes and port layouts, so check the model number printed on the back or on the box. Compare the listed resolution, refresh rate, and input types against your laptop’s output capabilities.
Step 1: Check Your Laptop’s Compatibility
Most connection problems come down to the laptop, not the monitor. Start by checking three things.
- USB-C with DisplayPort Alt Mode: Look for a USB-C port with a small DP or lightning-bolt icon in the spec sheet. Many USB-C ports only handle data and charging.
- Power delivery: If the monitor is bus-powered, the port needs to supply enough current. Manufacturers typically specify the power draw in watts; compare that figure against your port’s rated output.
- Driver and OS version: Keep Windows or macOS updated, and install the latest graphics driver from your laptop maker or GPU vendor.
If your laptop only has HDMI or older Mini DisplayPort, you will need an adapter or a different connection method. Check the monitor’s documentation for supported input types.
Step 2: Gather the Right Cables and Accessories
Use the cable included in the box whenever possible. Cheap USB-C cables sometimes support charging but not video, or they cap data speeds and cause flicker. If you need a replacement, choose a cable that is explicitly rated for video output and the power level you need.
| Item | Why You Need It | What to Check |
|---|---|---|
| USB-C to USB-C cable | Carries video and power from laptop to monitor | Labeled for video or DisplayPort Alt Mode |
| USB-C to USB-A cable | Powers the monitor from a USB-A port on the laptop or a power bank | Enough wattage for the panel |
| HDMI adapter (if needed) | Connects to laptops without USB-C video output | HDMI version matches the monitor’s input |
| Monitor cover or stand | Protects the screen and sets viewing angle | Fits your exact model size |
If you plan to use the monitor in a bag, a protective sleeve or a case designed for portable displays reduces the chance of screen damage. For more on protection, see Acer Portable Monitor Cover: How to Choose and Use One (2026).
Step 3: Connect the Monitor Correctly
Wired Connection Sequence
- Turn off the laptop’s display output temporarily or close any apps that use the external screen.
- Connect the video cable from the laptop’s USB-C port to the monitor’s input.
- If the monitor needs separate power, connect the USB-A or second USB-C cable to a powered port.
- Wait 5 to 10 seconds for the monitor to wake and the laptop to detect it.
- Press Windows key + P (Windows) or open Displays settings (macOS) to choose the display mode.
Choosing a Display Mode
You will usually see four modes: duplicate, extend, second screen only, and first screen only. For most people, extend is the right choice because it gives you a second workspace. Duplicate is useful for presentations. Set the monitor’s position in the arrangement panel so your mouse moves in the direction you expect.
Adjusting Resolution and Scaling
Set the monitor to its native resolution in display settings. If text looks too small, increase scaling in increments of 25 percent rather than jumping to a large value. On a 14-inch panel, 125 to 150 percent scaling often produces readable text without wasting space.
Step 4: Calibrate Brightness, Color and Refresh Rate
Portable panels are often set to a bright default. Lower brightness to a level that matches your primary laptop screen, usually somewhere in the middle of the range. If you edit photos or video, switch to a calibrated color profile and avoid vivid or dynamic presets.
If you are gaming or scrolling smoothly, check that the refresh rate is set to the monitor’s maximum in the advanced display settings. Some systems default to 60 Hz even when the panel supports higher rates.
Step 5: Troubleshoot Common Problems
- No signal: Swap the cable, try a different laptop port, and confirm the port supports video output. Restart the laptop after connecting.
- Flickering: Replace the cable with a certified one and reduce the refresh rate one step to test stability.
- Monitor not detected: Update the graphics driver and check that the monitor is not in a power-saving state.
- Display shuts off when laptop sleeps: Adjust power settings so external displays stay active, or disconnect and reconnect after waking the laptop.
For a broader set of fixes that apply to many portable displays, see Portable Monitor No Signal Power Saving Mode: 7 Fixes That Work and Forhelp Portable Monitor No Signal?.
Step 6: Set Up a Stand and Ergonomic Position
Looking down at a monitor on a desk causes neck strain. Position the screen so its top edge sits at or slightly below eye level, roughly an arm’s length away. A stand that supports both portrait and landscape orientation gives you more options. Many users place the monitor beside the laptop at a slight angle to keep both screens within comfortable view.
For stand ideas that suit a portable panel, read Portable Monitor Stand Magnetic: How to Choose and Use One (2026) and Folding Portable Monitor Stand Guide: Setup, Fit and Tips.
Common Mistakes to Avoid
- Using a charging-only USB-C cable and wondering why the screen stays blank.
- Leaving brightness at maximum, which drains the laptop battery faster and causes eye fatigue.
- Connecting through a cheap hub that cannot handle the video bandwidth.
- Forgetting to update the graphics driver, which causes detection and scaling issues.
- Placing the monitor too low, leading to neck and shoulder discomfort after long sessions.
Tips for Getting the Most From Your Setup
- Keep one cable dedicated to the monitor so it stays matched to the port.
- Use a laptop stand on your main screen as well to align both displays at the same height.
- Learn your keyboard shortcut for display switching so you can toggle modes quickly.
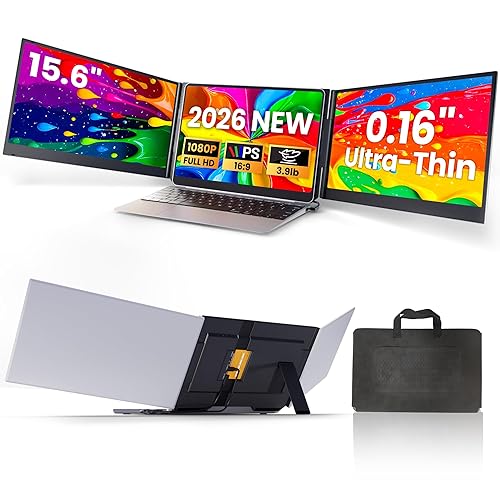
- If you want a second monitor setup with three screens, plan the layout before buying more hardware. See Portable Triple Monitor Setup: A Step-by-Step Guide for Laptop Users.
Recommended Gear
- Acer PM1 Series portable monitor accessories: A matching cover or sleeve protects the panel during travel and keeps the screen free of scratches. View on Amazon
- Certified USB-C to USB-C video cable: A cable rated for DisplayPort Alt Mode helps avoid the no-signal and flicker issues that come from low-quality cords. View on Amazon
- Adjustable portable monitor stand: A stand lets you raise the panel to eye level and angle it for better posture. View on Amazon
FAQ
Does the Acer PM1 series need a separate power adapter?
Many PM1-series setups can run from the laptop’s USB-C port alone, but some configurations draw more power than the port supplies. Check the model’s documentation for the rated power draw and connect a second USB-A or USB-C cable from a powered source if needed.
Can I use the PM1 series with a phone?
Only if your phone supports USB-C video output and the monitor accepts that input. Many phones do not support external display output without a dock, so confirm compatibility first.
Why does my monitor show a black screen after connecting?
The most common cause is a cable that carries power but not video. Swap the cable, confirm the laptop port supports video, and reselect the display mode in settings.
What resolution should I set?
Use the native resolution listed in the monitor’s specifications. Running below native resolution can make text look soft.
Can I mount the Acer PM1 series on a wall?
Some portable monitors include a VESA mounting pattern on the back. Check your specific model’s documentation before mounting, and use a VESA-compatible bracket. For details, see VESA Mount for Portable Monitor: Step-by-Step Setup and Buying Guide.
Is the PM1 series good for gaming?
It can work for casual gaming on a laptop, but refresh rate and response time matter more than size for competitive play. Confirm the panel’s refresh rate and make sure your GPU can drive it.
How do I reduce eye strain when using a portable monitor?
Match brightness to ambient light, set text scaling to a comfortable size, and follow the 20-20-20 rule: every 20 minutes, look at something about 20 feet away for 20 seconds. If you experience persistent discomfort, consult an eye care professional.
Conclusion
The acer pm1 series portable monitor is straightforward to set up once you confirm your laptop’s USB-C video support, use a proper cable, and configure display modes correctly. Most problems trace back to cables, ports, or drivers, and each has a clear fix. Work through the checklist above, position the screen at eye level, and you will have a reliable second display wherever you work.
Ready to choose one?
About Owen Palmer
Owen Palmer is part of our editorial team and reviews and edits our consumer tech how-to & troubleshooting guides, checking product details against manufacturer specifications and owner feedback.