 By Owen Palmer
Updated November 2026
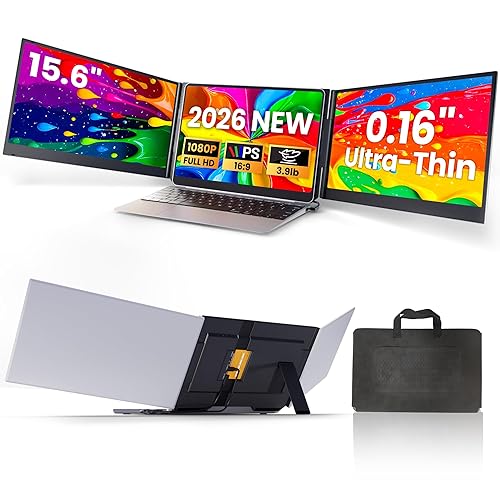
An ingnok portable monitor setup comes down to four things: choosing the right cable and power method, connecting the display correctly, adjusting the display settings, and positioning the screen for comfortable use. Once those steps are done, you can extend or mirror your laptop screen in a few minutes. This guide walks through each stage and shows you how to troubleshoot the most common problems.
What You Need Before You Start
Gather your gear before you touch a cable. Most setup problems come from using the wrong cable or an underpowered port, not from the monitor itself. Check the manual or the box for the exact connection types the model supports, because portable monitors vary in what they accept.
Shopping for one? See our guide: Dell Pro 14 Plus Portable Monitor Review: Is It Worth It?.
- The ingnok portable monitor and its included cables (check the box for a USB-C cable, a mini HDMI or HDMI cable, and a USB-A power cable)
- A laptop or device with a USB-C port that supports DisplayPort Alt Mode, or an HDMI port
- A USB-C to USB-C cable rated for video and data, or a USB-C to USB-A cable if your model uses that for power
- A cover or stand, if your monitor includes one, so you can prop the screen at a comfortable angle
- A charger rated at least 15W for the monitor’s power input, if it draws power separately
Step 1: Confirm Your Port and Cable Compatibility
Before connecting anything, identify which video output your computer supports. A USB-C port is not automatically a video port. Look for a small DisplayPort or Thunderbolt logo beside the port, or check your laptop’s spec sheet for “DisplayPort Alt Mode.” Many laptops that charge over USB-C also carry video through it, but a few budget devices only use USB-C for charging.
Next, check which cable the monitor expects. If your ingnok model has a USB-C video input, a standard USB-C charging cable may not carry the signal. A cable labeled for video or USB 3.x data is the safer choice. If your laptop has only HDMI and your monitor has a mini HDMI input, you will need a mini HDMI to HDMI cable.
Step 2: Connect the Video Cable
Using USB-C Video
- Plug the USB-C end of the cable into the monitor’s video input.
- Plug the other end into a USB-C port on your laptop that supports video output.
- Wait about five seconds. Most laptops detect the display automatically and show a prompt.
Using HDMI
- Connect the mini HDMI or full-size HDMI cable to the monitor, matching the port type on each end.
- Connect the other end to your laptop or desktop’s HDMI port.
- If nothing appears, press your laptop’s display shortcut (Windows key + P on Windows, or the display settings menu on macOS).
Step 3: Provide Power
Many portable monitors draw power from the device they connect to, which is convenient but can drain a laptop battery quickly. If the ingnok model has a separate power input, connect a USB power adapter to it. Use a charger with enough output for the monitor, and avoid cheap multi-port hubs that may not deliver stable current.
If the screen flickers, goes dark under load, or shows a “no signal” message only when the laptop is on battery, the power supply is usually the cause. Plug both devices into wall power and test again before troubleshooting anything else.
Step 4: Set the Display Mode
Once the monitor is connected, choose how your computer uses it. Each mode suits a different task.
| Mode | What It Does | Best For |
|---|---|---|
| Extend | Treats the monitor as an extra workspace | Multitasking, spreadsheets, reference windows |
| Duplicate (Mirror) | Shows the same image on both screens | Presentations, sharing a screen with someone nearby |
| Second screen only | Turns off the laptop display | Desk setups with the laptop closed |
Windows
Press Windows key + P, then choose Extend, Duplicate, or Second screen only. For fine control, open Settings, go to System, then Display, and arrange the screens by dragging the numbered boxes.
macOS
Open System Settings, select Displays, and choose Arrangement. Drag the display icons into the position that matches your physical layout. You can also set the menu bar to appear on the main display only.
Step 5: Adjust Resolution, Refresh Rate and Scaling
Set the resolution to the monitor’s native value, which is listed in the spec sheet. Running below native resolution looks soft; running above it may not work at all. Most portable monitors list 1920 x 1080 as their native resolution, but confirm the exact figure for your model.
- Set the refresh rate to the highest value the monitor lists, usually 60Hz for standard models.
- If text looks too small on a 14-inch or 15.6-inch screen, increase scaling to 125% or 150%.
- Enable night light or blue light filtering if you work late, using your operating system’s built-in setting.
Step 6: Position the Screen for Comfort
Place the top edge of the screen at or slightly below eye level, about an arm’s length away. A portable monitor sitting flat on a desk forces you to look down, which strains the neck over long sessions. Use a folding stand, a book, or a laptop-style riser to raise it. Keep the screen tilted back about 10 to 20 degrees so glare from overhead lights does not wash out the image.
Common Mistakes
- Using a charging-only cable. The monitor shows nothing even though it charges. Switch to a cable that carries video.
- Skipping the input switch. Many monitors have multiple inputs. Press the input button until the correct source appears.
- Leaving the display on mirror mode by accident. If the second screen shows nothing new, check whether duplicate mode is active.
- Running the laptop on battery with a power-hungry monitor. Plug in both devices when you can.
- Ignoring driver updates. Keep your graphics driver current, especially on Windows.
Troubleshooting Quick Checks
If the monitor stays black after setup, work through these checks in order. Restart the laptop after each change so the system re-detects the display.
- Confirm the cable is seated firmly at both ends.
- Try a different USB-C or HDMI port on the laptop.
- Switch the monitor’s input source manually.
- Connect the power adapter, if the model has one.
- Update your graphics driver or operating system.
For a deeper look at signal issues, see Portable Monitor No Signal Power Saving Mode: 7 Fixes That Work. If you are unsure whether your model needs a separate driver, Innoview Portable Monitor Driver: Do You Need One and How to Fix It covers how to check.
Tips for a Better Setup
- Keep cables short and secured so the monitor does not get pulled off the desk.
- Use the same type of cable for both charging and video if your model allows it, so you have fewer adapters to carry.
- Save display arrangements in your system settings if you switch between a desk and a travel setup.
- If you plan to use the monitor on the go, a stand that folds flat makes transport easier. See Folding Portable Monitor Stand Guide: Setup, Fit and Tips for fit tips.
- For a more permanent desk layout, a mount can free up space. VESA Mount for Portable Monitor: Step-by-Step Setup and Buying Guide explains the fit requirements.
Recommended gear
A few accessories make the ingnok setup more reliable and comfortable. Choose items that match your monitor’s connection type and size.
- A USB-C cable rated for video and data. A cable with confirmed video support avoids the most common no-signal problem. View on Amazon
- A mini HDMI to HDMI cable. Useful if your laptop only has HDMI output and your monitor uses mini HDMI input. View on Amazon
- A folding portable monitor stand. Raises the screen to eye level without taking up desk space. View on Amazon
- A USB-C power adapter with at least 30W output. Gives the monitor and laptop stable power during longer sessions. View on Amazon
FAQ
Why does my ingnok portable monitor show no signal?
The most common cause is a cable that carries power but not video, or a USB-C port on the laptop that does not support video output. Try a cable labeled for video, confirm the port supports DisplayPort, and select the correct input on the monitor.
Does the monitor need a separate power source?
Some models draw power from the connected device, while others need a dedicated USB adapter. Check the spec sheet for your model. If the screen flickers or dims, connect a power adapter.
Can I use the monitor with a phone?
Phones with DisplayPort Alt Mode over USB-C can sometimes drive an external display, but support varies by device and model. Confirm your phone’s specifications before buying a cable.
What resolution should I set?
Set the monitor to its native resolution, which is listed in the spec sheet. This gives the sharpest image and avoids scaling blur.
Why is the text too small?
Increase display scaling in your operating system settings, usually to 125% or 150% on a smaller screen.
Can I mount the monitor on a wall or arm?
Many portable monitors support VESA mounting. Check the back of the monitor for the hole pattern and the spec sheet for the supported size before buying a bracket.
Will the monitor work with a Mac?
Yes, provided the Mac’s USB-C or Thunderbolt port supports video output. Use the macOS Displays settings to choose the arrangement and mode.
Do I need to install drivers?
Most setups work without a driver. If the monitor is detected but the display does not work correctly, check the manufacturer’s support page for a driver specific to your model.
Conclusion
A successful ingnok portable monitor setup depends on matching the right cable to the right port, providing reliable power, and setting the display mode and resolution correctly. Work through the steps in order, and most problems resolve quickly. Position the screen at eye level and keep cables tidy so the setup stays comfortable and dependable.
Related reading
Ready to choose one?
About Owen Palmer
Owen Palmer is part of our editorial team and reviews and edits our consumer tech how-to & troubleshooting guides, checking product details against manufacturer specifications and owner feedback.