 By Owen Palmer
Updated November 2026
A usb type c hub with hdmi adds an HDMI output to a laptop or tablet that only has USB-C ports, so you can run an external monitor or TV. This guide shows you how to confirm your device supports video output, pick a hub that delivers the resolution and refresh rate you need, and set it up correctly the first time.
Step 1: Confirm Your Device Supports Video Over USB-C
Not every USB-C port carries video. A hub can only send a picture if your computer’s port supports DisplayPort Alt Mode, which is the signal path most HDMI hubs rely on. Check your device’s spec sheet for “DisplayPort Alt Mode” or “video output over USB-C.” Thunderbolt 3 and Thunderbolt 4 ports include it. Many charging-only USB-C ports on phones and budget tablets do not.
Step 2: Match the Hub to the Resolution You Need
HDMI version and hub chipset determine the maximum output. Most hubs list their limits as a resolution at a refresh rate, such as 4K at 30Hz or 4K at 60Hz. Work backward from your monitor: if it runs 4K at 60Hz, a hub limited to 30Hz will look choppy for scrolling and video. Look for HDMI 2.0 or newer on the hub’s specifications.
Step 3: Check Power Delivery and Other Ports
Many hubs include a USB-C pass-through port for charging. Confirm the wattage your laptop needs, because a hub that passes through too little power may slow charging or drain the battery during heavy use. Also check whether the hub has USB-A ports, an SD card reader, or Ethernet, and whether the number of ports you need actually fits within the bandwidth limits.
Step 4: Connect and Configure the Display
- Plug the hub into a USB-C port on your computer. Use the port that supports video if your laptop has more than one.
- Connect an HDMI cable from the hub to your monitor or TV, and power on the display.
- On Windows, open Display Settings and select “Extend these displays” or “Duplicate.” On macOS, open System Settings, then Displays.
- Set the resolution and refresh rate manually if the display does not pick the correct values automatically.
Common Mistakes to Avoid
- Plugging into a charging-only USB-C port, which carries no video signal.
- Ignoring refresh rate and buying a hub that caps output at 30Hz.
- Using a low-quality HDMI cable that drops the signal at high resolution.
- Overloading the hub with several high-draw devices at the same time, which can cause flickering.
Recommended Gear
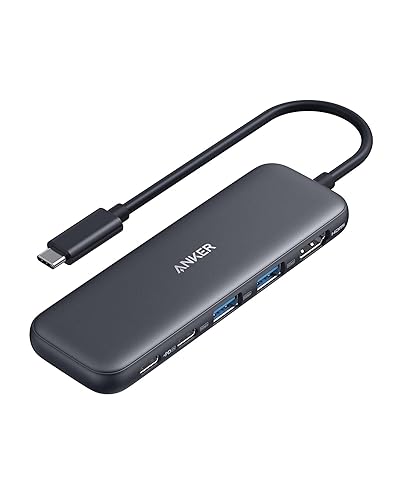
- Anker 552 USB-C Hub is a compact option that many owners use for HDMI output plus extra USB ports on a desk setup. View on Amazon
- StarTech.com USB-C Multiport Adapter with HDMI is a well-known choice for travel use where a small footprint matters. View on Amazon
- Belkin USB-C to HDMI Adapter offers a simpler single-output design if you only need the display connection. View on Amazon
If you are still comparing hub styles, USB Hub USB Type C: USB-A Hub vs USB-C Hub (2026): Which Should You Choose? explains the difference. For an overview of how the hub itself works, see What Is a USB Hub and How Does It Work?. You can also review Best USB-C Hubs for more options.
FAQ
Will a USB-C to HDMI hub work with any laptop?
Only if the laptop’s USB-C port supports video output. Check for DisplayPort Alt Mode in the manufacturer’s specifications before buying.
Why does my external display flicker when I use a hub?
Flicker often comes from insufficient power, a poor-quality cable, or too many devices drawing from the hub at once. Try a shorter, certified HDMI cable and disconnect nonessential accessories.
Can a hub output 4K at 60Hz?
Some can, but many are limited to 30Hz. Check the hub’s listed specification for 4K at 60Hz, and confirm your monitor and computer support it too.
Conclusion
A usb type c hub with hdmi works best when your device supports video over USB-C, the hub meets your target resolution and refresh rate, and the cables are up to the job. Confirm those three things first, and setup usually takes only a few minutes. Check the manufacturer’s specifications for the latest details before you buy.
Related reading
Ready to choose one?
About Owen Palmer
Owen Palmer is part of our editorial team and reviews and edits our consumer tech how-to & troubleshooting guides, checking product details against manufacturer specifications and owner feedback.