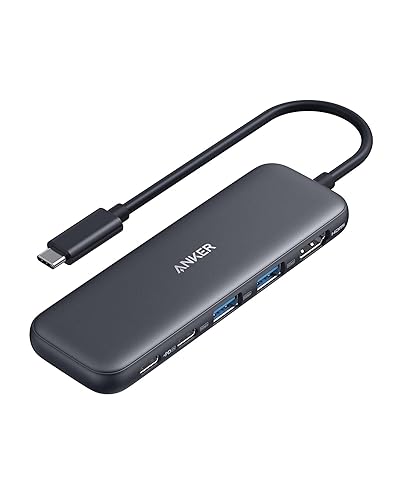
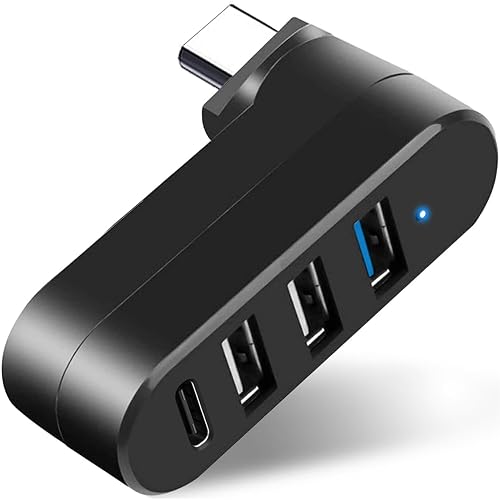
 By Owen Palmer
Updated November 2026
A Ugreen USB C hub adds the ports your laptop is missing, such as USB-A, HDMI, SD cards and Ethernet, through a single USB-C connection. This guide walks you through matching the hub to your laptop, connecting it correctly and fixing the most common problems when a port stops working. Most issues come down to power, cable choice or display settings, and they are usually quick to diagnose.
Step 1: Confirm Your Laptop Supports the Features You Need
Not every USB-C port is the same. Before buying or troubleshooting, check whether your laptop’s USB-C port supports data, video output and power delivery. Manufacturers usually list this in the spec sheet, and the port is often marked with a small icon of a lightning bolt (power) or a monitor symbol (video).
Shopping for one? See our guide: 3 Best Ugreen Revodok Pro 6-in-1 Usb-c Hubs (2026): Our Picks.
If your laptop only has one USB-C port, a hub that passes through charging is the most practical choice. If you plan to run two external monitors, check that your laptop supports multiple display output over USB-C, since many entry-level machines do not.
Step 2: Match the Hub’s Ports to Your Devices
Make a short list of what you plug in every day. A typical setup includes a monitor, a keyboard or mouse, a flash drive, an SD card and sometimes a wired network connection. Compare that list against the hub’s port types before you connect anything.
| Need | Look for |
|---|---|
| External monitor | HDMI or DisplayPort output, with a stated maximum resolution and refresh rate |
| Older USB accessories | USB-A ports |
| Camera cards | SD or microSD card slots |
| Wired internet | Gigabit Ethernet port |
| Charging while docked | Pass-through USB-C power delivery input, with the wattage the manufacturer specifies |
If you are unsure which hub style fits your setup, the comparison in USB-C Hub vs Docking Station (2026): Which Is Better for Your Setup? explains the trade-offs clearly.
Step 3: Connect the Hub Correctly
Plug the hub directly into your laptop rather than through an extension or a second adapter. Then connect peripherals one at a time. This makes it easier to spot which device causes a problem if one fails.
- Disconnect any other USB-C accessories from the laptop.
- Plug the hub into the laptop’s USB-C port that supports data and video.
- If the hub has a power input, connect a charger that meets the wattage the manufacturer specifies.
- Connect your monitor to the HDMI or display port, then turn it on.
- Add USB-A devices and cards one at a time, checking that each is detected.
For Mac users, the setup steps differ slightly, and USB-C Hub for Mac: How to Choose and Connect One (Step-by-Step) covers the display and power settings in more detail.
Step 4: Troubleshoot When a Port Stops Working
When a port fails, work through the likely causes in order. Most failures trace back to power or display settings rather than a defective hub.
Check the Power Supply First
Hubs that drive several high-power devices can draw more current than a laptop port provides. If your monitor flickers or USB drives disconnect, connect the hub’s power input to a charger that supplies enough wattage. Owners often report that this alone resolves intermittent disconnections.
Check the Display Settings
If the monitor stays black, open your operating system’s display settings and confirm the external screen is detected. Use the “Detect” option if available, and lower the resolution or refresh rate if the monitor does not support the current setting. Repair of Samsung Tablet: 6 Steps to Diagnose and Fix Common Problems goes further into this.
Check the Cable and Port
Try a different USB-C cable if the hub is connected with one that came from another device. Cables that support data transfer are not always the same as those that support video or fast charging. Restart the laptop after changing any setting.
Common Mistakes to Avoid
- Plugging the hub into a USB-C port that only charges and does not transfer data.
- Expecting a monitor to work at its top resolution without checking the hub’s stated maximum output.
- Connecting too many high-draw devices at once without an external power source.
- Using an extension cable between the laptop and hub, which can cause signal loss.
- Ignoring driver or operating system updates when a device is not recognized.
Recommended Gear
- Ugreen USB C hub with HDMI and USB-A ports: A practical choice for a single-cable desk setup that needs a monitor and peripherals. View on Amazon
- Ugreen USB-C hub with SD card reader: Useful if you transfer photos or video files often and want card access without a separate reader. View on Amazon
- Ugreen USB-C hub with Ethernet: Suits desks where a wired connection is more reliable than Wi-Fi. View on Amazon
FAQ
Why does my Ugreen USB C hub not show up on my laptop?
First confirm the hub is plugged into a USB-C port that supports data, not a charge-only port. Restart the laptop and try a different cable if the hub still does not appear.
Can a Ugreen USB C hub charge my laptop?
Only hubs with a pass-through power input can charge the laptop while docked. Check the manufacturer’s listed wattage and make sure your charger meets or exceeds it.
Why is my external monitor flickering?
Flickering usually points to insufficient power or a resolution the hub cannot sustain. Connect the hub’s power input, then lower the monitor’s resolution or refresh rate in your display settings.
Conclusion
A Ugreen USB C hub works best when it matches your laptop’s port capabilities and your daily device list. Confirm the port supports data and video, connect devices one at a time and check power when something drops out. Most problems resolve with a power adjustment or a display setting change.
Related reading
- Usb-c Hub for Steam Deck: What to Buy, What to Avoid, and Why
- Usb C Hub for Chromecast: Does It Work and Which Setup to Use?
- USB-C Hub with Ethernet Port: How to Choose and Set One Up
- USB Type C Hub with HDMI: How to Choose and Connect One (Step-by-Step)
Ready to choose one?
About Owen Palmer
Owen Palmer is part of our editorial team and reviews and edits our consumer tech how-to & troubleshooting guides, checking product details against manufacturer specifications and owner feedback.